Some people have a long bucket list, mine was short and had only one entry.
Make a bucket.
And
I can report success.
Some friends and I took a class at Port Townsend Woodworking School on coopering. This only covered buckets so the complexity added to get to a barrel would need a significantly longer time then the weekend this class was.
If you have any interest in how these kinds of wooden vessels are made I really highly suggest this course. It was great and since there some specialty tools needed that are pretty much just for coopering, it's worth it.
For instannce this coopering plane is notably larger then any plane I'd xseen before. And you did use it by moving the wood over the blade rather than move the blade.
The 15 slats in piles are the ones that are correctly shaped, They are both tapered along the length and angled on each side face.
The top left piece of wood is the example that all of the other 15 are trying to copy. The larger piece in the center is the blank that needs to be planed. And finally the V shaped object is what was used to make sure the angles on each side face was the correct angle. You stand the slat on end and try to line up the pencil marks with the edge of each slat and make sure it sits flush.
Once you have all sixteen assemble it around a rubber donut on a stick, and hammer down a temp testing band. Then check that all the slats are aligned well. If not go back and look at the problem slats and make them better copies of the gold standard.
I had to do this 4 times, I had a tendency to angle it slightly to much on one side and too little on the other side so they ended up a bit twisted.
Next up form your own ring. We started with a straight bar of steel, measured our bucket and cut the steel to length. Bent it around a form, drilled holes in the portion that overlapped. Then hand riveted the ends together. That was all pretty easy.
Hard was deforming the ring so it had the same slope as our bucket would have. This was done buy hammering the steel on an anvil-esque object (a piece of railroad tie) slowly and evenly around the whole edge. This was loud and tedious but with care you had a slightly flared ring that matched your bucket.

Then of course you did it again, because you need two rings.
Next up is using this scorp to remove the faceted faces of the inside. You want to get this as close to round as reasonable as it makes creating the notch for the bottom, and fitting the bottom in which also means it's tighter and less likely to leak. It's also a good time to take a spoke shave and flatten the bottom of the staves as they are all slightly angled out.
To make this
It was about 30 minutes of doing this to get the groove cut in
Then we formed the bottom. First cut a circle that is as big as the inside circumference of the slot. We measured the slot using dividers. Getting them wide enough that it takes 6 steps to go around the bucket using them, getting this as close to correct as possible is important for leak prevention. Too big and it will keep the staves from sealing together, too small and water can leak through the slot.
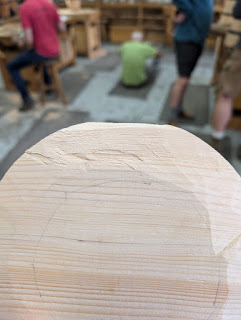
Once cut (we used a band saw) use a drawknife and spokeshave to shave down the edges so it would fit tightly into the above groove.
Sadly this is where I ended making my biggest error, as I accidentally ended up tearing off a whole portion of an edge along the grain and had to start over again.
Thankfully the second one went very well and fit in nicely.
|
|
And now I have a bucket.

Initial usage there was a small amount of seepage from the bottom, but as I let it sit filled with water the wood swelled enough so that it all sealed up.
 |
| Seepage! |
 |
| Used to make some ciderkin, while I put a plate under it in case it seeped I can report it did not the bucket is in fact a bucket. |


Comments
Post a Comment